Sparco Custom Easy tutorial
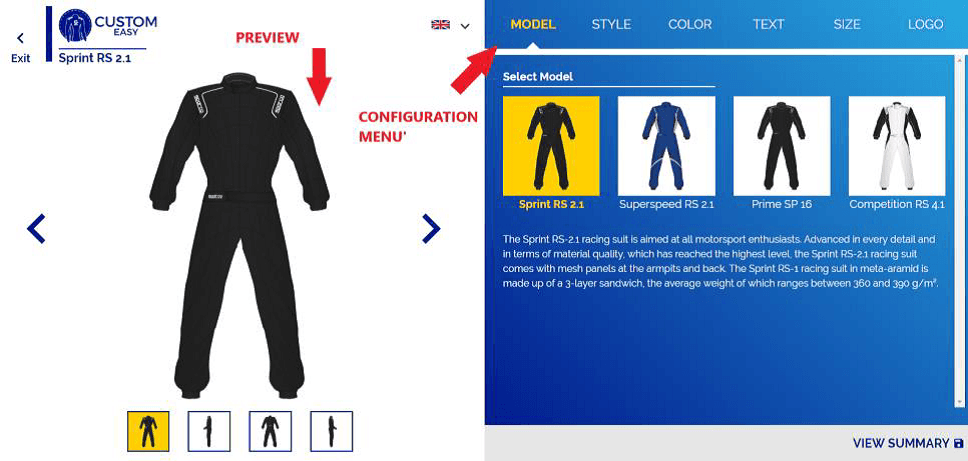
Creating a custom suit consists of 6 steps: 1. Choose the model 2. Choose the style 3. Choose the colours 4. Type your text 5. Enter the size 6. Insert logos
The above steps are available by the menu items on the right side of the page, while on the left you can see a preview of the suit while it is composed. By clicking on MODEL you can choose the basic model of suit among the 4 available: - Sprint - Superspeed - Prime - Competition
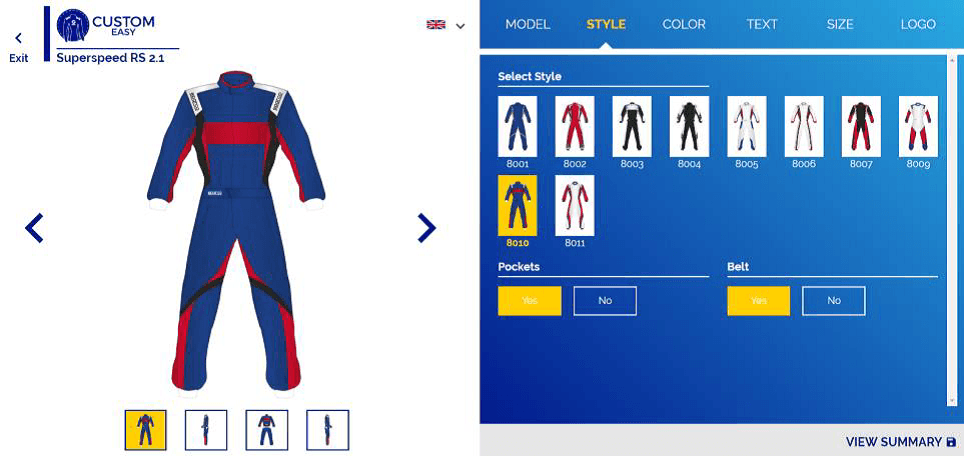
By clicking on STYLE you can choose the design of the suit from 10 different options. It is also possible, for some models, to choose the options for Pockets and Belt.
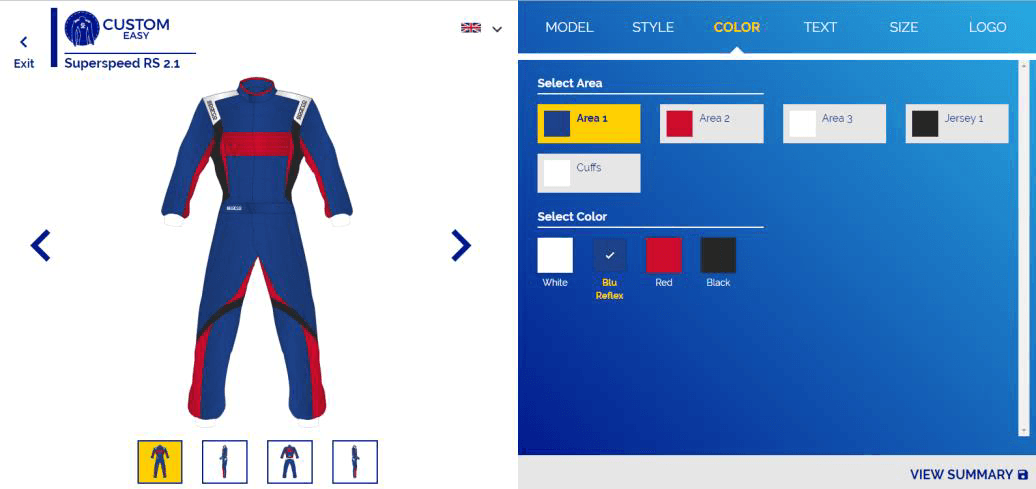
By clicking on COLOR you can choose the colour from the list of available ones for the different fabric areas. It is also possible to choose colours for jersey and for cuffs:
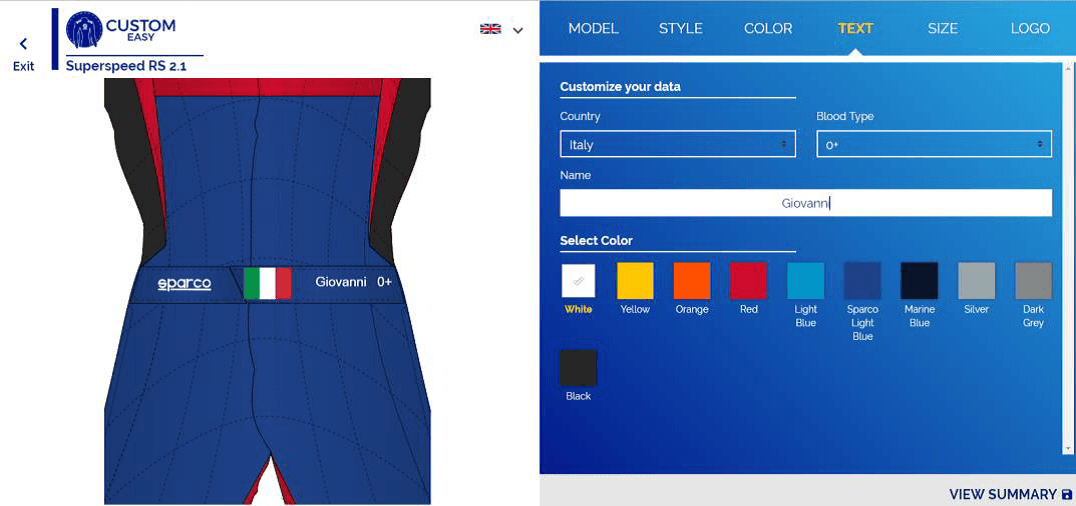
By clicking on TEXT you can customize the suit with the flag of your country, the blood group and your name. It is also possible to choose the color of the embroidery. The text will be embroidered on the belt, if provided, or directly on the suit.
By clicking on SIZE, you access the measurement configuration page, which can be set in three different ways: - Standard size - Tuned standard size - Customized
The second and third option require additional cost. To choose the standard sizes mode, simply click on Standard and choose your size from the drop-down menu.
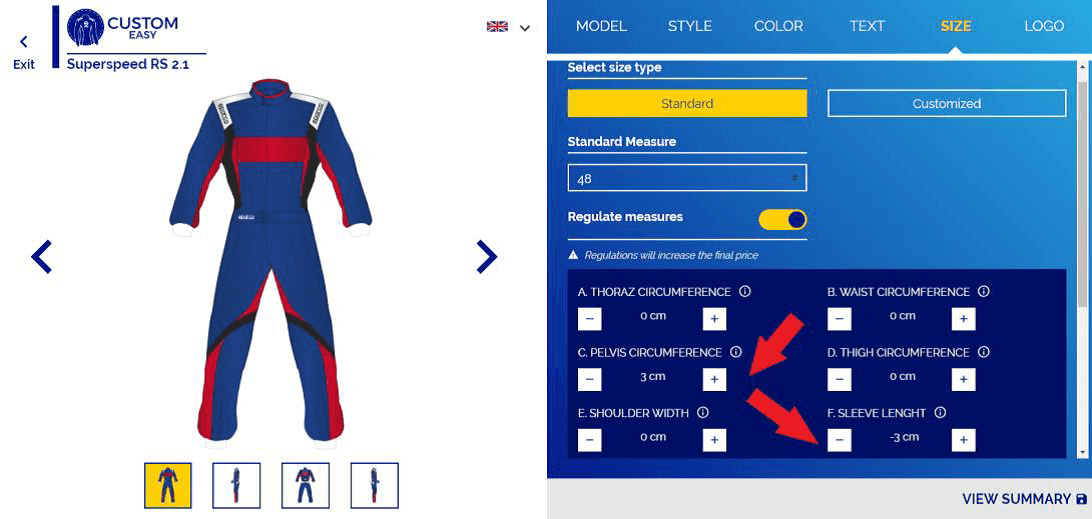
To choose the second option (tuned standard size) always click the Standard option, then activate the selector Regulate measures and adjust the measures that you want to change by choosing the tolerance more or less within the limits allowed by the system.
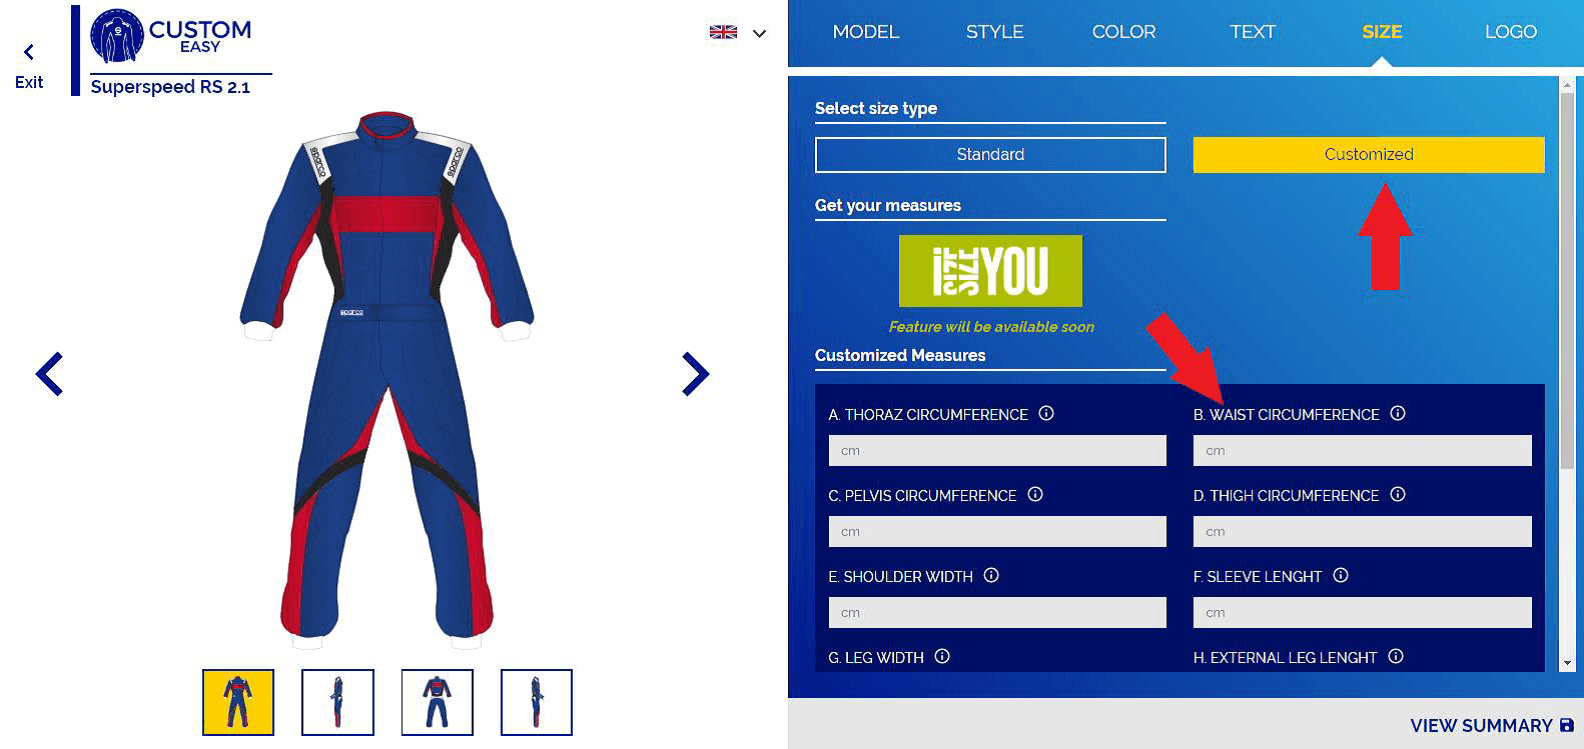
Finally, for the customized option, click on the Customized button and manually set the different values of the body measurements required:
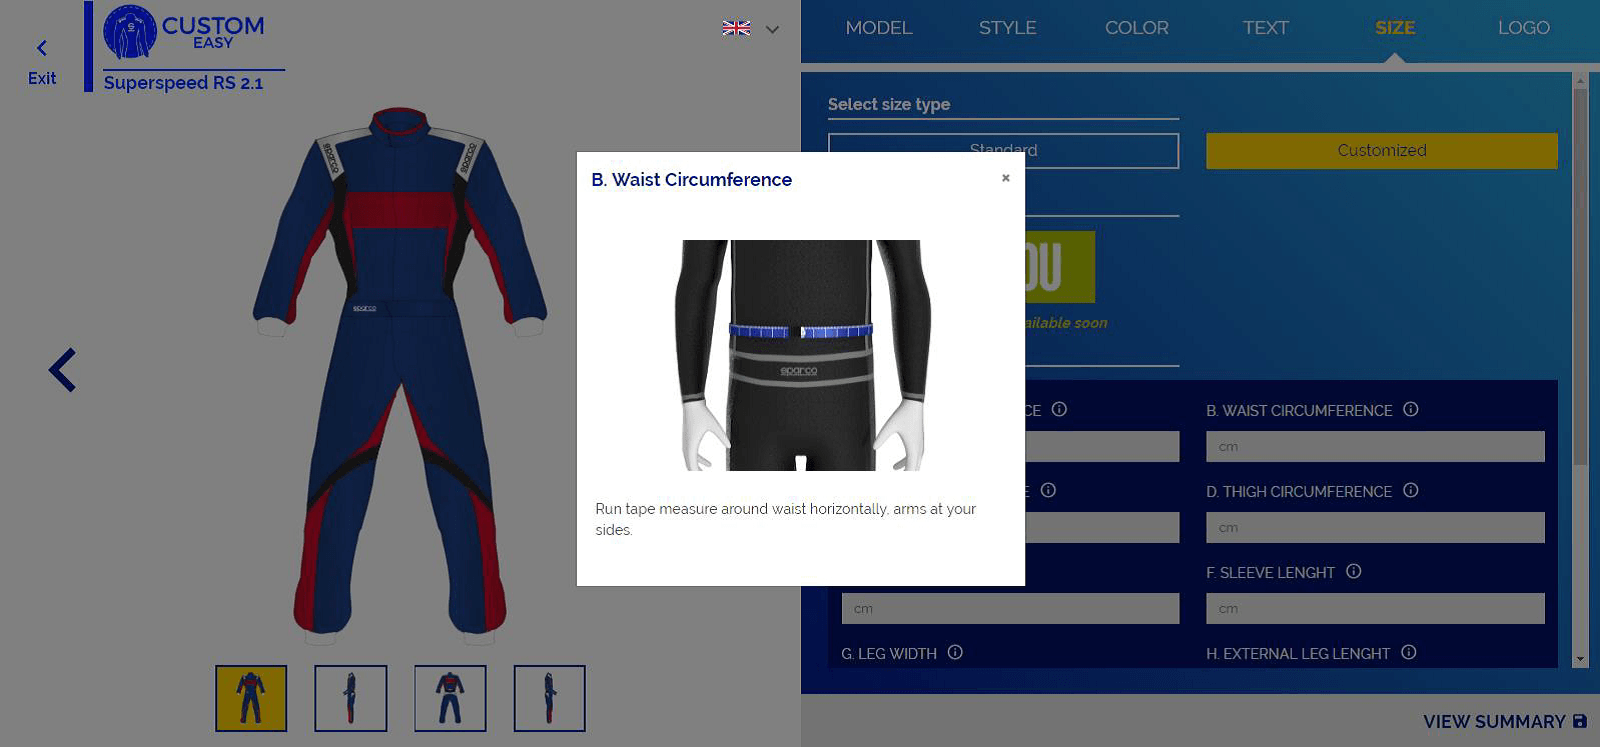
For each of the measures requested, clicking on the icon next to the label it is possible to activate a tutorial on the best way for taking measurements.
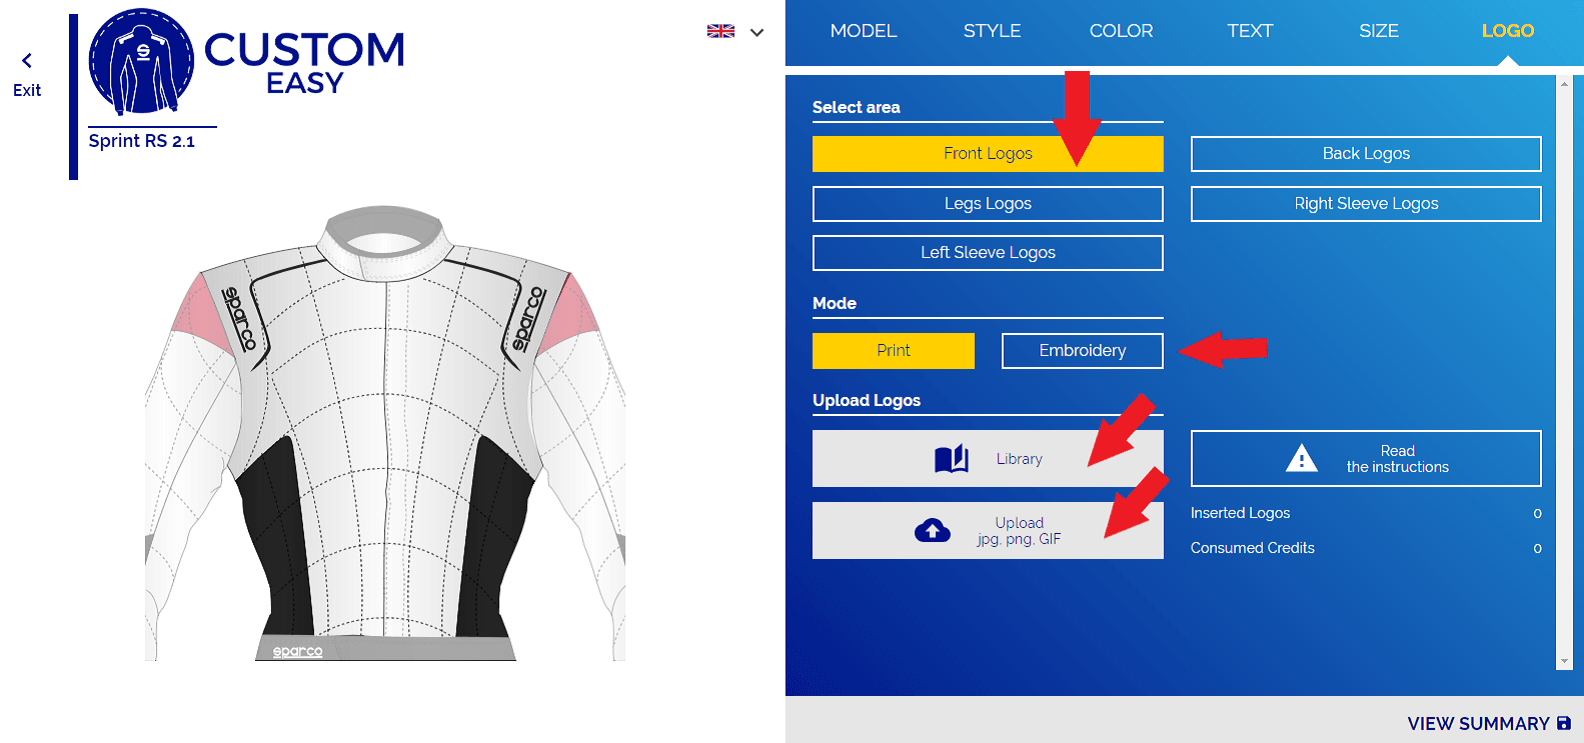
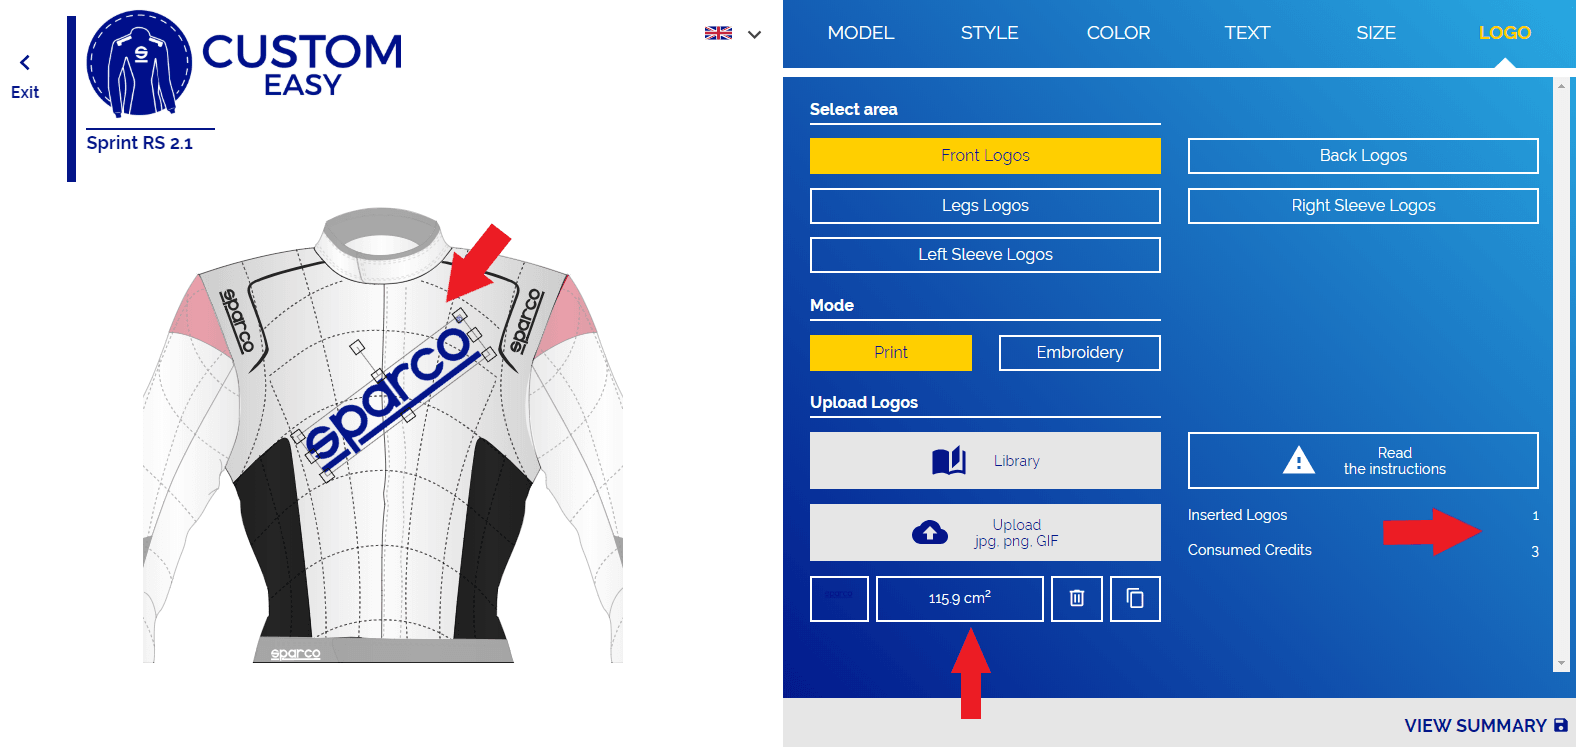
By clicking on LOGO, you can access the logos application page. The page allows you to select the different areas on which inserting logos is possible and the application mode (print or embroidery). The two modes have different prices and, once the option is selected, it applies to all the logos of the suit. To apply a logo it is necessary to select the desired area and either click on Upload (this opens the dialog box in which you can select the image file of the desired logo from your PC) or click on Library and thus choose the logo among a list of available pre-charged logos NOTE: image files should have high resolution to be used for the application of the logo. If possible, prefer vector formats.
Once the image is uploaded, the system allows, through the appropriate "handles", to move it, rotate it and resize it. Furthermore, the system gives a realistic indication of the size of the applied logo and of the consumed credits.
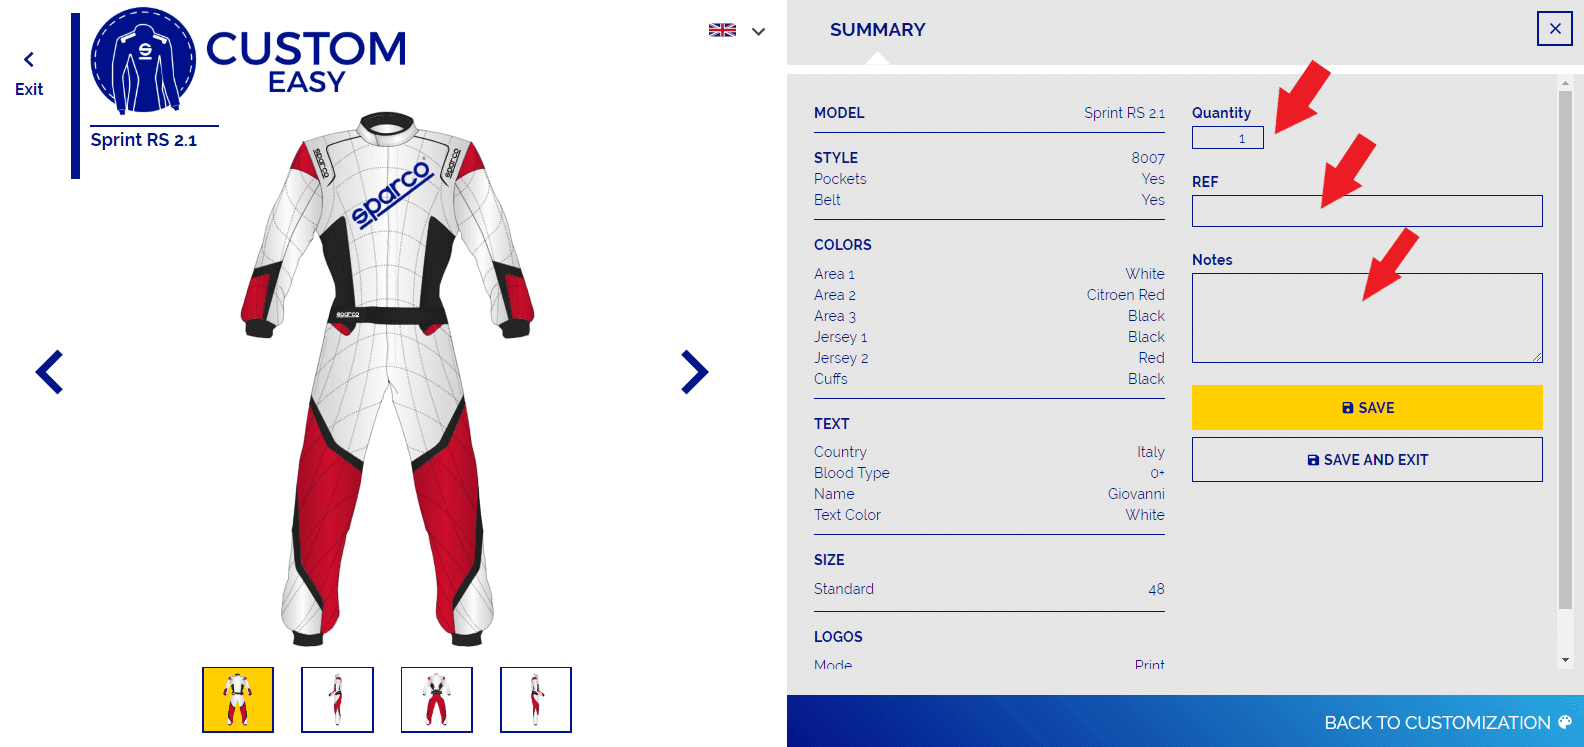
The logos component will modify the cost estimate according to the credit rule. Each logo "consumes" a number of credits proportional to the area exposed with the application of a credit every 50 cm2. Once all the steps have been completed, clicking on VIEW SUMMARY at the bottom right you can view a summary report of the personalization created:
In the summary page it is possible to change the quantity of the suits to be ordered (all of which will be identical), edit some personalized notes and use the REF field to insert an optional reference code. In the same summary page there are two more buttons: - The SAVE button allows saving what has been done up to now
|


 |
| Basket | Wish List | New Account | Login |